If warped walls and flying wheels are familiar to you, you may be a Ninja Warrior fan. Take your ninja warrior skills to the next level by learning how to build a ninja warrior obstacle course in your backyard!
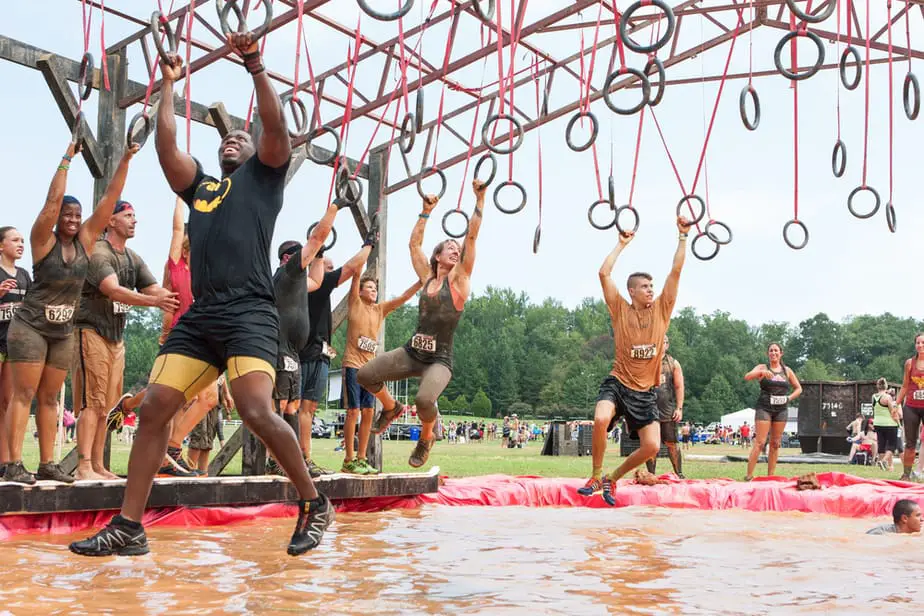
Ninja Warrior obstacle courses have been around for over a decade. Nothing screams that you are in top physical shape than competitively competing in a Ninja Warrior obstacle course.
American Ninja Warrior is a spin-off of the Japanese series Sasuke. The series premiered on December 12, 2009. The sports competition gained popularity and is still popular today! Contestants compete in increasingly difficult obstacle courses to gain a spot in the National Finals. There are four stages of obstacle courses in the Nationals. Contestants strive to be the Last Ninja Standing and win $1,000,000. Only a handful of competitors have ever successfully completed all stages of the competition to be dubbed an “American Ninja Warrior”.
Whether you plan to compete in the next season of American Ninja Warrior or just want to improve your physical stamina and agility, you will need to train like a ninja warrior! A ninja warrior obstacle course in your backyard will help you do that.
Let us help you create the perfect Ninja Warrior obstacle course in your backyard. These courses will be geared toward teens and adults. For a more kid-friendly obstacle course check out our ideas in Obstacle Course for Kids: 23 Ideas to Try!
Table of Contents
Planning Your Ninja Warrior Obstacle Course
So you’ve decided to build a ninja warrior course in your backyard! There are many varieties of obstacles and your only limitation is your creativity. With a few DIY skills you can even re-create some of the most popular obstacles from the TV show in your own backyard.
Begin planning your ninja warrior course by thinking of your available space. What do you already own that can be turned into an obstacle worthy of a ninja warrior obstacle? Do you have a swing set with monkey bars? How about a tree with sturdy limbs for a Tarzan rope swing?
The quickest and easiest way to get your ninja skills rolling is to purchase a kit. Some of our favorite kits are the slackline kits. Attach the slackline between two trees, then attach a variety of hanging obstacles. The Fofana kit comes with freestyle rings, monkey bars, spinning wheels, and a climbing ladder. The different elements can be arranged in a variety of ways. You can use this kit alone or pair it with some of the DIY builds below!
Next, map the space in your yard and where you think the course will be best. If you are going to be running on a certain obstacle, make sure the ground is level. Draw out your ideas on a piece of paper and sketch where each obstacle will go.
Always keep safety in mind! There are inherent risks when running obstacles like those suggested below. Ensure that anyone who participates is aware of these risks and is physically able to use these obstacles safely!
Get your tools ready! If you don’t have an electric screwdriver then now is the time to get one, because you will be using it! Check out our reviews of the best electric screwdrivers on the market. Some of the other tools you will need include hammer, jigsaw, drill, measuring tape, and shovel.
Now let’s plan how to build a Ninja Warrior course in your backyard with these five do-it-yourself obstacles!

- Ninja Adventure Fun: Dive into the Fofana ninja obstacle course and channel your inner warrior with 9 challenging obstacles that enhance agility, strength, and endurance. This outdoor playground set is perfect for budding ninja champions
- Unplug And Play: Get the kids off screens with this thrilling outdoor playset featuring a climbing rope ladder, spinning wheel, monkey bars, gymnastic rings, and more. It's the ultimate ninja obstacle course for kids outside play and other fun outdoor activities
- Family Challenge Time: Perfect for the whole family, this ninja course invites kids and adults to engage in friendly races. It's one of those top gifts for active kids and toys for active boys, transforming your backyard into the ultimate outdoor obstacle course for kids
- Durable And Safe Design: Built with high-quality steel in bold Black and Red, this ninja obstacle course withstands rough play and various weather conditions, offering lasting fun in your outdoor playground
- Quick Setup Adventure: Set up your ninja slackline obstacle course in just 10 minutes! The 65 ft slackline easily hangs between trees without harm, turning any outdoor area into a thrilling adventure zone. Perfect for adding a ninja slackline to your backyard setup
Last update on 2025-03-28 / Affiliate links / Images from Amazon Product Advertising API
How to Build 5 Ninja Warrior Obstacles
1. Warp Wall
The warped wall is the most iconic feature of a Ninja Warrior course. Most city finals courses in American Ninja Warrior end with the warped wall. For a backyard warped wall you can build a quarter pipe or build a high warped wall against an existing wall. Follow these instructions to build a 14 -16 foot warped wall against a house .
Materials:
- 7-8* 4’x8′ Sheets of Plywood
- One 2’x4′ Board (amount needed will vary based on height and width of wall)
- Jigsaw
- Box of 2 1/4” Wood Screws
- Electric Screwdriver
*The width of the wall can be the full 4 feet of a sheet of plywood. Or you may choose to cut one piece of plywood in half lengthwise for a width of about 2 feet.
Step 1: Soak 1-2 Sheets of Plywood
First, determine if your warped wall will be the entire width of the plywood sheet or if you want a half-width. If you chose half-width, cut the plywood in half lengthwise before soaking.
Now, soak 1-2 sheets of plywood that will be used as the wall top. If you have a swimming pool, this would be a great place to soak the wood while you construct the frame. Place weights or bricks on the board to make sure they are fully submerged in the water.
Step 2: Create a Curve Outline
Next, lay three sheets of dry plywood into an “L” shape in the grass. You will cut the curve of the wall onto these sheets of plywood. To draw a curve, place a string around a screwdriver and attach a pencil to the other end. Stick the screwdriver into the ground where you want the center of the curve to be. A radius around 10 feet is a great starting place, but you can choose something different too. Using the pencil draw your curved line onto the “L” shaped plywood.
Repeat with the opposite side of the wall with another set of 3 boards in the “L”. Make sure the curve of the boards matches! Then, cut the boards with a jigsaw along the curve.
Step 3: Build the frame
Now you will place the lumber supports on the plywood curves. Screw the 2 x 4, or similar study lumber, to the sides to the curve that will lay against the wall using your electric screwdriver. Attach these supports to the existing wall or house. Make sure to space them so the plywood top curve can fit on top, depending on if you are using a half-width or not. If you used full-width, space the boards about 3.5 feet apart. For half-width about 1.5-2 feet apart.
Step 4: Support Rungs
Next, create stepping supports up the curve by using cut 2 x 4s the width of the ramp. Secure to the sides of the curve spaced 8-10 inches apart. More supports should be added at the base and can tapper off towards the top, which will not receive foot traffic.
Step 5: Add the Warped Wall top
Finally, you can use your soaked plywood to create the curved ramp on top of the supports. Screw the ramp onto the supports. Add PVC or foam to the top of the ramp board to grab.
2. Ninja Warrior Salmon Ladder

The salmon ladder is another common ninja warrior obstacle and an excellent strength builder. This obstacle takes a regular pull-up and jumps it to the 10th degree! You can construct this element on an existing structure or create one from scratch using the plans below.
Materials:
- Two 12’-15’ 4×4 wood posts
- Two-Three 8’ 2×4 pressure-treated board
- One 4’ 2×6 pressure-treated board
- Box of 3” nails
- Box of 2 ¼” Heavy-duty wood screws
- Post digger or shovel
- 1 Bag of Quick Set cement
- Tape measure
- Electric drill
- Straight edge
- Hammer
- Metal Bar about 4 feet wide
Step 1: Prepare the Frame
Build the frame of the salmon ladder first. Lay the 4 x 4 posts parallel on the ground spaced about 3.5 feet apart. The posts will be buried about 2.5 feet into the ground. Mark a line at the 2.5-foot mark on each post. Measure up about 4 feet from this mark. Draw a line. This will be where you place your first rung.
Step 2: Create the rungs
To create the rungs of the salmon ladder, you will need to measure the width of your post plus about 4 inches. The rungs should extend from the posts 4 inches. Create about 6 rungs for each size by cutting the 2×4 boards. You can trim one side of the rung at 35 degrees or angle the board when attaching the rungs to the post.
Step 3: Attach the rungs
Before screwing in the rungs, mark the location for each rung. Starting at the 4-foot line you created in step 1, make a mark every 6-12 inches until you reach the top of the posts. If you are just beginning with the salmon ladder, start with 6 inches between each run. Ready for a challenge? American Ninja Salmon ladders are 12 inches apart, so you can decide where to place the rungs. Using about four wood screws, attach the rungs to the posts at a 35-degree angle with four inches of the rung extending past the posts at each of the lines you marked.
Step 4: Finish frame
Once you have attached the rungs, cut and secure the 2 x 6 board to the top of the frame. Double-check that the rungs on both sides are pointed up and even.
Step 5: Dig Holes and Set Posts
Now it is time to dig! We have reviewed the best shovels for digging and the best post hole digger so you can get back to completing your project. Use the hole digger, or shovel, and dig two holes the spaced at the width of your ladder (3.5 feet). The holes should be dug 2.5 feet deep. Mix up a bag of quick-set concrete.
Lift the frame into the holes and double-check the height. Pour in the concrete and support the beams with boards angled at 45 degrees. Let the concrete cure at least overnight.
Step 6: Add the Metal Bar
Now your Salmon ladder is ready to use! Put the metal bar on the bottom rung and work your to the top!
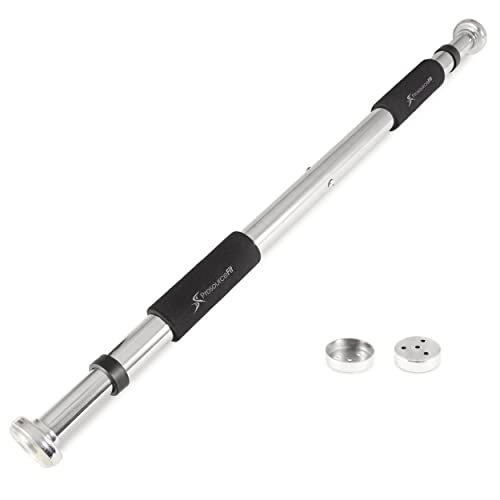
- DOORWAY MOUNT - Heavy-duty pull-up bar mounts in most standard doorframes; in-cludes end cap brackets and screws
- ADJUSTABLE & DURABLE – Extendable rod can be adjusted to fit inside of doorframes between 24”-39”; Holds up to 220 pounds
- COMFORT GRIPS – 2 cushioned foam grips are more comfortable for hands and mini-mizes slipping and fatigue
- UPPER BODY TRAINING – Perfect for at home-workouts to build upper body muscles, great for programs like P90X
- MULTIPURPOSE – A convenient way to improve fitness with pull-ups, chin-ups, triceps dips, leg raises; can also be used as a foot anchor for crunches
Last update on 2025-03-28 / Affiliate links / Images from Amazon Product Advertising API
3. Quintuple steps
Quad or Quintuple steps are an easy and quick build. These instructions will make a set of five, but you can make up to eight steps out of one piece of plywood or save the remaining material for another project!
Materials:
- One 4’x8’ sheet of plywood ¾’ thick
- Five 2’x4’x8’ boards
- Ten 4” bolts
- 20 washers
- 10 nuts
- Jigsaw
- Wood Screws
- Drill
- Measuring Tape
- Pencil
Step 1: Divide Plywood
Using a measuring tape and pencil mark out 2’x2’ sections on your sheet of plywood. This will create about 8 sections. We will be using five sections to make our obstacle. Cut out at least 5 sections with your jigsaw.
Step 2: Cut Boards
Each step will need two sections of 2×4 cut to two feet for the supports. You will need two more sections that are 2’ long for the kickstands. Therefore, we will cut 20 sections that are each 2 feet long.
Step 3: Attach the Frame to Platform
Use two 2’ sections for the left and right of the platform. Place the platform on top of the frame and make sure the boards are flush with the left and right sides. Secure with about 5 wood screws.
Step 4: Kickstand
American Ninja Warrior steps can vary from 45 degrees to 60 degrees in their angle. If you want to be able to change the angle of your steps, use a bolt to attach the kickstands instead of a screw. You will need to trim the end of the kickstands if you want the board to pivot. Drill a hole for a bolt, washer, and nut. Attach the bolt, washer, and nut to all the kickstands.
Step 5: Set up the steps
You can space the now complete Quintuple steps however you like. Try out a few configurations to give you the most challenge in your Ninja Warrior training!
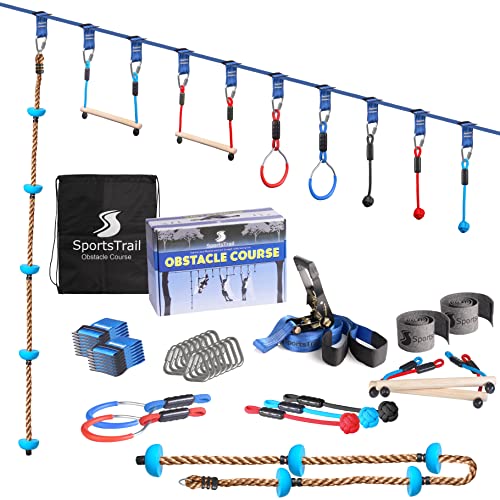
- Sportstrail obstacle course: 42' x 2'' slackline, 8' x 2'' ratchet, 440lbs capacity, steel ratchet, 13 buckle sets, 7 obstacles, climbing rope, tree protectors, carry bag.
- Perfect for adults and children – our slackline has 13 square buckle sets for adjustable difficulty. Suitable for ages 5+. Use as strength training or a slackline by removing obstacles.
- Our ninja warrior course sets up quickly. Just find two sturdy points 10-30ft apart, like trees or beams, that can bear 2200 pounds. Perfect for backyard, gym, or outdoor fun.
- Tree protectors and carry bag – get tree protectors, caring for nature. Use them to safeguard trees and your slackline. Also includes a padded carry bag for easy transport.
Last update on 2025-03-28 / Affiliate links / Images from Amazon Product Advertising API
4. Jumping Buckets
This is the easiest tutorial so far! All you need are some old 5-gallon buckets and wooden stakes! Place your wooden stakes into the ground spaced out where you want the buckets. Put the buckets upside down on top of the wooden stakes. Now try to balance and jump on top of each bucket to the next obstacle.
5. Peg Climbing Wall
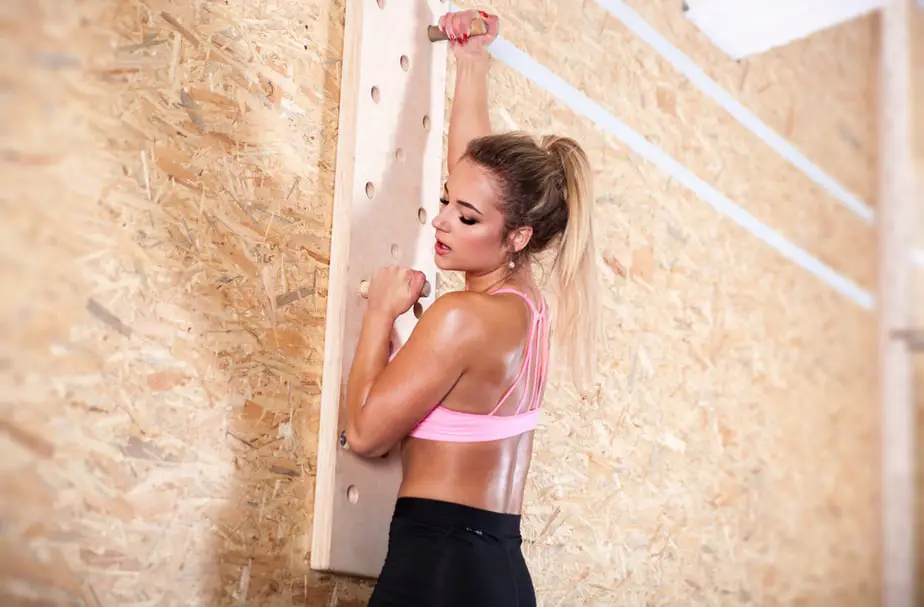
A peg wall can lay vertical, horizontal, or traverse. Choose the design you like best or that works for your setup. Peg walls such as the one below can be purchase for a relatively good price. However, they are even cheaper to build.
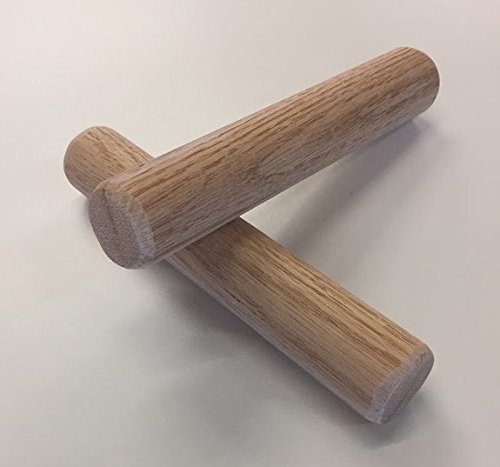
- Set of 2 Climbing Holds
- Solid oak hardwood dowels
- 1.25" diameter by 7" in length
- Fits perfectly with our peg board receivers. If ordering for an old board, make sure the holes on your board are just over 1-1/4" in diameter. 1-5/16" hole in your pegboard is ideal.
Last update on 2025-03-28 / Affiliate links / Images from Amazon Product Advertising API
Materials:
- One 8’-10’ 2×8 Board
- One 8’ 2×4 Board
- 1 ¼” Dowel Rod
- Chipboard or plywood
- Box of 1” Wood Screws
- Box of 3” Wood Screws
- Sandpaper (optional)
- Wood Stain (optional)
- Power Drill
- 1 ¼” Spade Bit
- Saw
- Pencil
- Ruler
Step 1: Prep the Board, Mark Holes
To prevent splinters, we recommend sanding the 2×8 board. Using a pencil and ruler mark 3 lines spaced evenly, about 2”, down the length of the board. Draw a mark every 6 inches down the 3 lines. Offset the middle line marks so the drill holes fall between the outside line holes.
Step 2: Drill the Holes
This step will take a little bit of time. Ensure that you hold the drill completely vertical while drilling your holes. Drill the holes where you made your 6” marks using the 1 ¼” spade bit.
Step 3: Attach Backing
Adding a backing to your pegboard will prevent the pegs from slipping all the way through the board and pinching your hand. You don’t need the board to be heavy-duty, just something to stop the peg. Use scraps of plywood or what you have on hand.
Trace the peg wall shape on the plywood and cut out. Use wood glue all over one side of the plywood then attach it to the back of the peg wall. Clamp the wood together or place on the ground with weight on top. Allow to completely dry.
Step 4: Cut the Dowels
You have almost completed your peg wall! Cut the 1 ¼” dowels to about 6” long, or your desired length. Cut two dowels, or more for extras!
Step 5: Hang Peg Wall
Hang the peg wall to an existing outdoor structure using 3” wood screws. If you do not have a structure in place, repeat the process used in the Salmon ladder to set two posts. Attach the peg wall at the angle desired to two set posts. Enjoy climbing the wall!
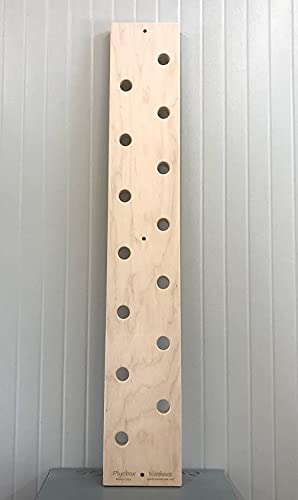
- New! Custom engraving options. Get your name, slogan, or gym name engraved on the board. Choose from Laser engraved or Carved engraved. See photos for examples.
- MADE IN USA!!! Veteran owned and operated business.
- 1-1/2" thick. Double layer 3/4" plywood. Made from high quality, cabinet grade maple or birch plywood.
- Comes fully assembled. Mounting hardware NOT included.
- Includes two 1-1/4" climbing dowels, as shown
Last update on 2025-03-28 / Affiliate links / Images from Amazon Product Advertising API
Wrapping Up
We taught you how to build a ninja warrior course in your backyard, the training is now up to you! Remember to always keep safety in mind while completing your course. Never push your body past your ability and work up to more difficult tasks. You will be ready to compete as the next American Ninja Warrior in no time!
To get you started, we recommend purchasing a quick set up slackline kit. It is well worth the price. Then, this tutorial took you step by step on how to build five obstacles in your backyard. The warped wall is the iconic final portal of the ninja warrior courses and a must-have for your backyard course. The salmon ladder will build your strength as you skip the metal bar up the rungs. The quintuple steps are sure to help improve your timing and agility as you train. Jump buckets are a quick and easy option to add to any obstacle course. Finally, the peg wall will get your climbing and building your ninja skills!
Who says exercise has to be boring? No more trips to the gym are in your future when you know how to build a ninja warrior course in your backyard! You and your family will enjoy hours of fun and training. If you enjoyed this article, you might check out this article on relay race ideas. See you on the next season of American Ninja Warrior!