Attempting to cut branches and stems using a pair of dull garden shears is a nightmare job. You keep cutting and cutting to no avail! If you learn how to sharpen garden shears, you’ll save yourself a lot of hassle and frustration.

Here’s a step-by-step guide.
Tools You’ll Need
You’ll need a couple of tools to help you sharpen your garden shears. Luckily, they’ll probably already be in your garden shed.
Here’s a list:
- Goggles
- Highly protective gloves
- Cloth for wiping
- Stiff brush
- Coarse sandpaper
- Coarse diamond hand file
Step 1: Clean Your Shears
First things first, before attempting to sharpen your garden shears, you’ll need to clean them first. All garden tools are prone to a lot of dirt because of the conditions they’re used in. Garden shears, in particular, are more exposed to dirt and contaminants than other tools because they come in direct contact with the plants.
For cleaning the shears, you’ll need some warm water, soap, and a stiff brush. Firstly, pour some soap into the water, create foam, and soak the garden shears for 15 minutes. You can keep them in the water for less if they’re not too dirty.
Afterward, grab your hard-bristled brush and start scrubbing the blades, making sure to remove all traces of mud or dirt. In this step, it’s essential to wear gloves for your safety. The stiff brush and the shears can both be a safety hazard if handled without enough care. It doesn’t matter if the blades are blunt; they can still cause injury.
In addition to wearing gloves, you can make sure to direct the blades away from your body for extra safety.
After you’re done scrubbing the mud off, rinse the shears using clean water, and wipe them with a cloth to remove moisture. If the shears are too dirty, you can always take them apart to clean them. Then, all you have to do is loosen the screw in the middle and wash each part separately.
Step 2: Remove Any Traces of Rust
If you frequently clean or rinse your shears using water, they’ll inevitably develop some rust, even if they’re made of stainless steel. Rust needs to be removed immediately because it may cause the shears to break apart eventually.
In this step, grab your sandpaper, open the shears wide, and scrub the blades firmly to remove the rust. Depending on the amount of rust on the shears, you can choose medium or coarse sandpaper. If you don’t have it, you can use any steel wool you have lying around.
After you’re done, rinse the shears once again using clear water and wipe them dry with a cloth.
Step 3: Prepare The Shears For Sharpening
How you position your garden shears for sharpening can make a world of difference. It can either make your process 10x easier or 10x harder. If you have your shears in the wrong position, you’ll hardly be able to do anything right.
For one, make sure the blades are facing away from your body. This way, you make sure you’re safe from potentially cutting yourself, and you can comfortably hold the handle while filing down the blades.
Next, open the shears wide, making sure the beveled edge is facing up. Your shears may have beveled edges on both sides. In this case, you’ll need to sharpen each side separately.
It’d help here if you have a bench vice. You can use it to stabilize the shears in place, so you’re able to file the blades without much hassle. If you don’t have a bench vice, you can resort to holding the shears with one hand and using the other hand to file.
Step 4: Hold The Blade File Correctly
Holding the blade file correctly is as essential as positioning the shears right. It’ll help you finish the process much faster and more efficiently.
All you have to do is hold the file in your hand, placing its flat side along the edge of the blade at a 20-degree angle. You may have to try a couple of times at first to get the position right, but you’ll eventually get it.
Step 5: Start Filing The Blades
When you have the file in the proper position, start moving it forward, beginning from the shears’ middle, where the screw is holding the blades together. Next, move it towards the other end of the blade in a straight motion. If your shears have short blades, you can ditch the straightforward motion and opt for circular movements, instead.
For long blades, keep the file moving forward without moving it from side to side. You don’t want the motion to cause tiny dents on the blade, so make sure the file is only moving forward. Keep your movements in single, smooth strokes along the blade’s length.
Needless to say, you should keep moving the blades away from your body rather than toward it. Additionally, try to keep the file at the same angle with every strike. That way, your blade will gain an even edge.
If your shear blades are moderately blunt, they’ll need around 20 strokes with the file to become sharp again. Blades that are extra blunt may need more. You’ll know your blade is ready when it’s shiny and its edge is sharp.
You can do a brief test on small branches to make sure the blade is sharp again. It should make the cut quickly and without a hitch — this is when you know you did a good job.
Step 6: Clean The Burrs
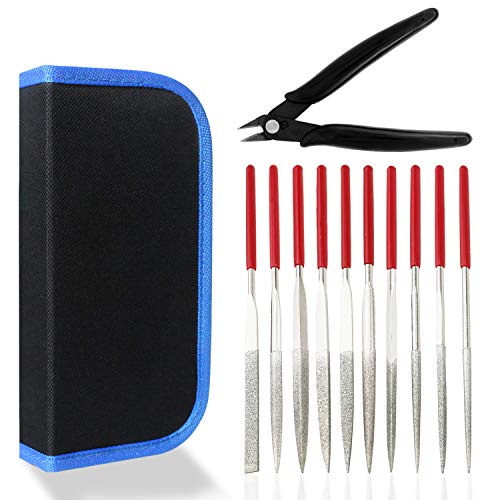
- 【Small size great for delicate works】 10 pcs 5.5'' diamond files, 1pcs 5'' wire plier, 1pcs 8'' carrying case, you will use these tools all in fine working.
- 【Perfect for delicate work】 These are for very small delicate jobs and light detailed sanding. Excellent for precise light work & fine accurate filing of metal parts.
- 【Extra wire cutting plier】 During our wood/metal/model/jewelry working, we always need to cut something, extra precision wire cutter in this tool set can help to easily cut off excess material, cut soft wire, cut openings, etc.
- 【Useful carrying bag】 A multi-use carrying case is included in this tool set, you can use it to storage files and cutters or another small tools you have. a small strap allows you to hang it on anything.
- 【Lifetime satisfaction guarantee】If there are any problem, please contact us, we will arrange to take a replacement or refund your purchase ASAP.
Last update on 2025-03-28 / Affiliate links / Images from Amazon Product Advertising API
As a result of the filing motion you just did, the blades will develop a tiny fold on the opposite side, called a burr. If you sharpen the bottom side of your blade, the burr will form on the top, and vice versa.
After you’re done sharpening, it’s time to remove the burrs to have a completely clean blade. To do that, turn your shears over so the backside is facing you.
Next, move the diamond hand file gently against the blade’s edge. Move it for only a few strokes, and the burrs should clean themselves out. After you’re done, do the same with the other blade, so both of them will be as sharp as a knife.
Bear in mind that applying too much pressure to remove the burrs will cause them to form again on the opposite side. So you’ll keep filing in an endless loop, and the burrs will keep forming. To avoid this, only apply moderate or mild pressure when you’re cleaning the burrs. This way, the opposite side won’t be affected.
Final Thoughts
Blunt garden shears can prove frustrating to deal with, and there’s no need to keep using them when sharpening isn’t that hard. All you need is a file and some safety tools. You’ll be done in a few minutes if you know how to do it. Even if you’re a beginner, the process won’t take long to get used to. ِ A new file will also help you work faster.
We hope that our guide for how to sharpen garden shears has been helpful!