Ever dream of taking your “Dancing with the Stars” skills to dancing under the stars? Perhaps you want to complete the uniquely sentimental backyard wedding. Learning how to make a dance floor out of plywood will do just that!
People have been dancing before there was even a written language. It’s no wonder that dancing has infused itself into our society. Whether it’s for a backyard wedding or a party with friends, a dance floor is sure to get your guests tapping their toes!
There are many options when deciding on a dance floor that’s right for your party. We’ll explore four options with a budget, preparation time, and purpose in mind:
- DIY dance floor out of wood with an option of using recycled pallets
- Use what you have: Dirt, cement, or deck
- Buy
- Rent
Any of these options will have you spinning for your first dance as Mr. and Mrs. or doing the wobble in no time! Read on to learn how to make a dance floor out of plywood (and other methods!).
Table of Contents
Option 1: DIY Dance Floor
Making a dance floor can be simpler than you thought with these easy steps. One trip to the hardware store will get you all you need. Enlist the help of friends and neighbors and you can have this floor finished in one Saturday!
There is also an option to create the base using recycled pallets and plywood floor. With this option, you’ll be dancing the cha-cha slide with money to spare in your pocket!
Step 1: Determine the Size of the Floor You Need
A general rule of thumb is to plan that 30%-40% of your guests will be dancing at any given time. Each couple will need about 9 square ft. to dance (or 4.5 square ft. per dancer).
For a party with 100 guests, about 40 will be dancing at once. This means you should plan for 40 (# of dancers) x 4.5 sq ft. (area per dancer) to get about 180 square feet.
Since this method will be how to make a dance floor out of plywood, we will be using plywood that is 4’ x 8’, suggested floor sizes are: 8’ x 8’, 12’ x 8’, 12’ x 16’, or 16’ x 16’.
Calculate the area needed for your party and use the best matching suggested size above. In our instructions for how to make a dance floor out of plywood, we will be constructing a dance floor that is 12’ x 16’ which is about 200 square feet and a decent size for a party of 100 guests. Make sure to adjust the numbers if you determined to use a different size.
Step 2: Pick the Location
Now that you have determined the size of your dance floor, it’s important to pick a location. Pick an area that is level and large enough for the dimensions of the dance floor. Remember that not all guests will be dancing at once, so consider spacing for tables and chairs in view of the dance floor.
Step 3: Gather Materials
Your local hardware store should carry all of the supplies you need, making it a one-stop-shop! Stores like home depot will often cut your wood for free.
Materials:
- 6 sheets of ½ inch plywood
- 30 eight-foot long 2’x3’ (Another option is to use recycled pallets instead of 2 x 3s for the base)
- Box of screws
- Nails
- Drill or screwdriver
- Floor top finish (Tiles, dance mat, or paint)
- 6 Mending plates
Cut 18 of the eight-foot planks into 2 x 3s into two 45” pieces. Keep 12 of these 8 feet long.
Step 4: Create the Base
Create the base using two eight-foot 2 x 3s laid horizontally. Screw six 45” pieces as supports in between these boards to create a “ladder” look.
Step 5: Repeat Until You Have Six Bases
Each base will be supporting one ½” piece of plywood that will be the top of the floor.
Step 6: Screw or Nail the ½” Plywood Sheets to the Tops of Each Base.
Carefully screw or nail the plywood on top of the base. There should be two nails or screws in each support. Four along each side length will hold your floor sturdily.
You should now have 6 completed dance floor pieces ready for your own configuration. In this video, you will see how the bases were completed.
Step 7: Lay Out the Dance Floor Sections and Complete a Finish.
Now that your dance floor is almost complete, lay it out in a 12’ x 16’ rectangle. Draw the layout on a piece of paper before you start moving the bases. Make sure it is a complete rectangle.
There are several ways to finish the dance floor. If you like the wood look, you may just choose to seal and weatherproof it.
While weatherproofing is optional, it is a great insurance policy if you are keeping your floor outside.
Keep in mind the purpose of your floor is dancing. Always opt for a nonslip finish, or your guest may do more slides than Cha-Cha. Finish the top of the dance floor with one of the options below:
- Paint: Paint is probably the cheapest option to get the most customized look. You can write your initials, use glow in the dark paint, or even create a work of art. Check out how this floor was painted to look like a checkerboard.
- Vinyl Sheet: Make your dance floor look like a professional dance studio by using vinyl floor sheets. Just roll it out on top of your floor. See the look here. You will need to secure the floor by binding to the plywood or nailing down the ends.
- Peel and stick tiles: If you want to make sure all the pieces come apart easily when you have finished, consider using peel and stick tiles as seen here.
- Vinyl dance mat: While the most expensive option, it is great choice if you are planning to use it regularly. The mat can be rolled over the wood floor when in use.
No products found.
Step 8: Secure the dance floor
You are almost ready to shake a leg! Ensure that your dance floor is positioned where you want it. Use mending plates to secure each dance floor piece together. Place the mending plates on the outside of the dance floor where each piece joins.
For the 12’x16’ floor, you will need 6 mending plates.
No matter how many people decide to get up and do the Nae, Nae or watch you whip your floor will hold it together!
Step 9: Get out and dance!
Your hard work has all paid off and now you can enjoy the next big dance party or wedding in your own backyard!
An Alternative to Option 1: Use Recycled Wood Pallets
Like the sound and look of option 1, but want to be even kinder on the wallet? Build a dance floor using recycled wood pallets.
By checking local listings, you can often find pallets for free! Wood pallets can be used to create the base, eliminating the need for any 2’ x 3’s! Depending on the size and quantity of pallets you can get, you may end up needing to trim some of your plywood. But, for the cost, it’s worth a try!
Follow all the other steps in option 1 after replacing your bases with pallets. Check out the finished product here.
Using recycled pallets can save you about $60 on materials.
Option 2: Use What You Have
If the instructions for constructing your own dance floor made your head spin, don’t give up on your dance floor yet! You may have everything you already need for the perfect dance party in your own backyard.
If you are considering a country theme to your party with line or swing dancing, kick up your boots and enjoy the cheapest way to make your dance floor: dirt!
A deck and cement area (such as a patio or basketball court) can also be easily converted into the perfect dance floor.
Dirt or Gravel
Step 1: Pick a Level Area of the Yard
Make sure the area you choose is free of any divots or holes. The slope of the yard should be relatively flat. If you find the yard is not smooth, make sure to level it before proceeding.
Step 2: Define the Boundary
Don’t confuse your guest by not having a clear boundary for the dance floor. There are many simple tricks for defining the boundary that will fit your theme.
Hay bales, pumpkins, flower planters, or recycled pallets placed in the four corners will do the job. Lighting can also serve a dual purpose of defining the boundary and illuminating the dance floor.
Step 3: Dust Control
Nobody will be dancing for long if they are having to breathe in the dust while dancing. Keep the dust down with these simple tricks:
- Spray the dirt lightly before the party. Don’t water heavily or you may end up mud wrestling instead of dancing!
- Use a dust control agent such as Dust Down Pro. It is non-toxic and a safe option if you plan ahead!
- Consider laying down small-sized gravel such as pea gravel or even a thin layer of sand. Just a thin layer is needed, as too much will have your dancers sinking in their steps.
- Continue the country feel with a thin layer of straw. You can lightly spray this a day before the party to enhance the dust fighting capabilities.
No products found.
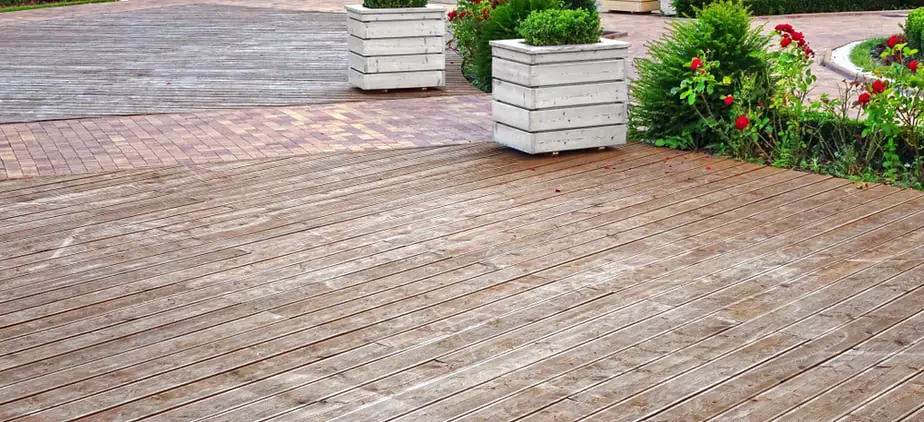
Deck or Cement
If you already have a good-sized deck or cement patio, consider using them as the main dance area. With a few simple tricks, your guest will never know its previous use:
- Add the perfect mood lighting. Adding just the right lighting can enhance any area and breathe new life into it!
- Level an uneven deck. Use 4 x 8 plywood to make and level area before laying down the flooring.
- Use flooring. Layout a dance floor on top of your existing patio or deck. Vinyl sheets or laminate flooring on top of the cement or deck will make it look like you installed a professional ballroom floor. We suggest using a non-slip grade!
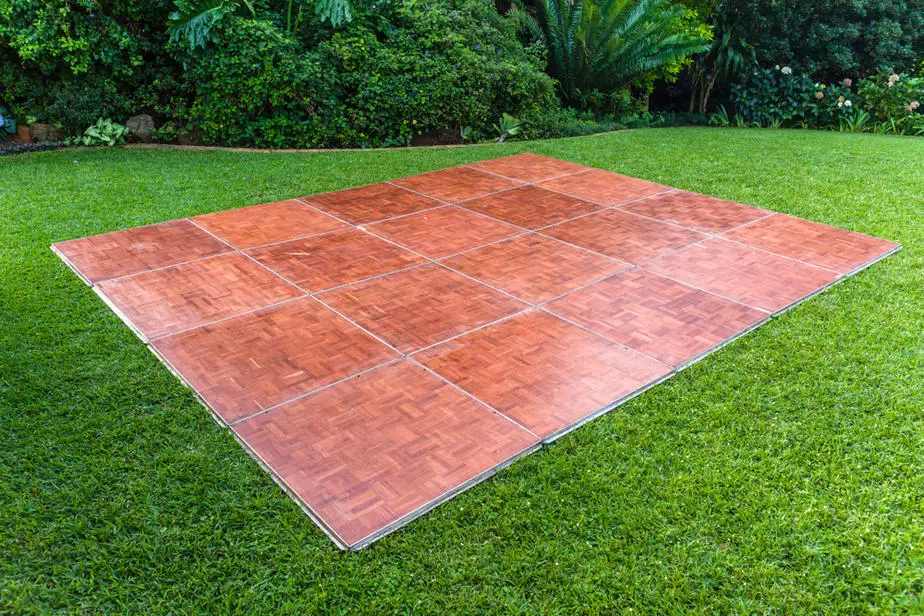
Option 3: Buy One

If none of the options above click your heels, consider buying a dance floor! While you are sure to spend more money, you will have a professional dance floor that can be used again and again! Perhaps, with enough practice, you will even be on the next “So You Think You Can Dance!”.
Many of the products available come in one square foot tiles. This makes storage a breeze! The tiles can be taken apart and easily stored in a garage or closet.
Most of the manufactured dance floors are made to be placed on a hard and sturdy surface. This would work best on a concrete slab or sturdy deck.
No deck or concrete? No problem.
Some dance floors are made to work on uneven ground. However, consider laying down a tarp and possibly plywood before assembling the dance floor on dirt or grass.
Step 1: Research Options and Pick What You Like Best
Many available sets require no tools and snap together. The sets come with options for how many tiles in each set. Make sure to purchase enough sets to cover the area you need for a dance floor.
For example, you would need to purchase about 3.5 sets of the IncStores 12″ x 12″ Practice Dance Tiles (52) to cover the area (182 sq. ft.) needed for a party of 100.
Buy three of the sets of 52 tiles and one set of 32 tiles.
If you want a border ramp, remember that it will need to be purchased separately!

- 【Inspire your improvement】Envision the ultimate dance studio with a printed tap floor that's engineered for greatness. With effortless installation and balanced glide, our ballet floor tiles are the perfect partner for almost every style of dance.
- 【Always on Pointe】Create the ideal dance floor for any event with our acclaimed dance floor tiles. Designed with rigid materials, these tiles offer versatility for both indoor and outdoor use. With six dazzling finishes to choose from, you can easily customize your temporary flooring over carpet or set up a dance floor for an unforgettable outdoor party. Experience limitless coverage potential and bring the right tools for the job with our exceptional dance floor tiles.
- 【Made for the moment】Our dance board kits are made with ultra-resilient polypropylene and topped with printed vinyl to match your style, provide consistent speed, make all the right sounds, and last for years and years of passionate performances.
- 【Take the show on the road】With a lightweight 3/8" profile, our tiles are the ultimate tap board for touring the world, assembling and disassembling in minutes for easy transportation with the rest of your dance supplies and/or ballet equipment.
- 【A foundation of quality】 For more than a decade, IncStores has been outfitting professional stages and personal studios with high-quality dance accessories in countless styles, because a stronger, safer, smarter performance starts from the floor up.
Last update on 2025-03-28 / Affiliate links / Images from Amazon Product Advertising API
Step 2: Buy and Ship to Your House
Make sure to buy your dance floor with plenty of time before the big event. You will need to plan for shipping time and installation once it arrives.
Step 3: Install the Dance Floor in Your Backyard
It is best to install your dance floor the day of or the day before your party so it is not damaged by the elements. Don’t forget that it will also be easier to connect tiles on a hard surface.
Step 4: Disassemble and Store
Plan for storage when you purchase your own dance floor. That way you can be ready to pull it out for your next dancing extravaganza!
Option 4: Rent a Dance Floor
If you are wanting a high-quality dance floor to perform all of your “Dancing with the Stars” moves, you may want to opt for making a dance floor by hiring a rental company. They will often handle the setup and take down, leaving you time to practice your two-step!
The cost of renting a dance floor large enough for 100 guests may range quite widely depending on the area and what you want.
Step 1: Check Out Local Rental Companies
When renting a dance floor, always get quotes from a few different companies. Ask the right questions to ensure you are comparing apples to apples.
- Do they provide the floor underlayment for the grass or tent floors?
- What is their cancellation policy?
- Do they install and deconstruct?
- Do they deliver or are you expected to pick up?
- When do they expect payment?
- Do they cancel in the event of inclement weather?
Step 2: Choose the Floor
Certain floors are better for outdoor use. Composite laminate floors are often the most scratch-resistant and do not require a tent. Vinyl floors are a good outdoor option, but some companies may require a tent to be over the floor.
Make sure to discuss with the salesperson where you plan to place your backyard dance floor. Many looks are often available from parquet flooring to sleek black vinyl.
Step 3: Enjoy the Dance Floor with Less Headache!
No tools needed and you will have a professional floor to dance on in no time! The cost to rent may be well worth your time and energy saved!
Final Touches to Your Backyard Dance Floor
Don’t forget the final touches to your dance floor that will set the mood and make your party the envy of the neighborhood. If your party will be after dark, consider how you will light the dance floor. The only thing your guests should worry about tripping over is their two left feet!
Lighting Options
- Check out this post which has pictures of many landscape lighting options that will work for an elegant party.
- String lights bring a great ambient light.
- After-holiday sales are great times to purchase projector lights of various colors and functions that serve well for party lights.
- Disco and party lights are a great addition. You will feel like the club came to your backyard!
- RGB flood lights have many color options and can be mounted on the ground, ceiling, or wall.
No products found.

- Multiple beams: The light can shows many patterns effect, light rotating effect can be selected as fast, slow or pause. Effect color can be selected as red, green or red & green.
- Multiple Work Modes: 1) Auto Mode: Random colors create a romantic and relaxed atmosphere. 2) Strobe mode: Colors appear and disappear quickly. 3) Sound control mode: Light color and speed changes with the rhythm of the music.
- Multiple operating modes: You can manually switch light on the light body, or use remote control to select the function that you want. It can make your party attractive.
- Light and easy to install: Silver aluminum alloy shell, tiny mounting accessories, that can be easily installed on the wall or ceiling, and can also be placed on the table or floor.
- Widely used for parties, disco, ballrooms, hotels, skating rink, public square, family gatherings, bar, KTV, party, concert and festival like Christmas, parks, Halloween, etc.
Last update on 2025-03-28 / Affiliate links / Images from Amazon Product Advertising API

Last update on 2025-03-28 / Affiliate links / Images from Amazon Product Advertising API
Get a DJ
Whether it’s your Uncle Dan or a professional DJ, make sure to plan for one! This will ensure that you can get out and enjoy the dance floor instead of keeping the music on.
Conclusion
We instructed you on how to make a dance floor in your backyard by building one from plywood, using existing areas, purchasing, or renting.
What persuaded you the most? Did you go for low cost and decide using your backyard assets or handyman skills were all you needed? Or did you opt for the convenience of renting or buying your dance floor?
With so many options to choose from, you are sure to know the perfect way how to make a dance floor in your backyard and how to make a dance floor out of plywood! Now put on your blue suede shoes and enjoy the dancing!