So you want to improve your golf game, but you don’t always have enough time to get down to the local driving range or country club. If you know how to make a backyard putting green, you can create your own practice facility in the privacy of your backyard.

Think about how many strokes you can shave off your average if you can practice putting every day after work!
Of course, you could practice in your office or on your living room carpet, but to get serious practice in, you need an authentic practice green. So how do you build one?
Well, we’re about to walk you through the entire process, step by step.
Table of Contents
Step 1: Choose Your Location
Before you decide anything else, the first thing you’ll need to choose is your putting green’s location. After all, you can’t very well work out any other details if you don’t know the lay of the land. There are a few important considerations to make when you’re choosing a location.
The first is the amount of sunlight that the ground receives. This isn’t a significant consideration if you’re using artificial turf – more on that later – but it can be a major concern if you’re using natural grass.
But what matters most is the slope of the ground, as well as the absorbency and smoothness of the surface. You’ll need a relatively flat area, with a slope of no more than 2 percent.
It’s also important to keep a sense of perspective when it comes to space. While America is all about the biggest and the best, it’s important to keep things in perspective; the average US golf course green measures in at around 5,000 square feet, more than 2 times larger than the average suburban home and more than 5 times larger than the average urban apartment.
Of course, not every putting green needs to be this big. It’s perfectly acceptable to have a small green, but you won’t be able to practice longer putts.
Another concern is whether or not your putting green will restrict property access or block you off from a part of your yard. The ideal location is towards a corner, preferably with partial shade so you can stay cool on a hot afternoon.
If you have a very large yard, it’s also possible to set up spots for practice with wedges and short irons. This will allow you to practice your short game and improve your wedge accuracy, in addition to working on your putting.
Of course, you can also build a full-length hole in a big yard, but that requires fairway maintenance, which gets complicated — and expensive — in a hurry.
Before you break the earth, sketch the area out beforehand using chalk or lawn-safe marking paint. You may be surprised at how seeing things laid out in paint can put your plan in perspective. This is especially important if you’re building near the property line since fences and hedges can make even a large green feel cramped if the green is too close to the fence.
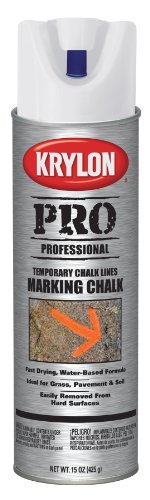
- Provides excellent temporary marking on grass, pavement or soil
- Inverted applicator allows you to spray upside down for easy marking
- Great for hopscotch, soccer, backyard volleyball, landscaping, and other marking applications
- Easily removed from hard surfaces
- This item is not for sale in Catalina Island
Last update on 2025-03-28 / Affiliate links / Images from Amazon Product Advertising API
Step 2: Choose Your Material
Once you know where your green is going to be located, the next step in planning your project is deciding whether you’re going to use real grass or artificial turf. Both materials have their own benefits and drawbacks, so we’ll take a closer look at each of them.
Grass Greens
From an aesthetic perspective, it’s tough to make an argument against a real green. Even the best artificial turf looks “off” compared to the beauty of real, natural grass.
That said, they require significantly more upkeep, so you’ll need to be prepared to invest time and money in its maintenance.
The most obvious problem is mowing. A proper putting green should be trimmed to an eighth of an inch or less in height — about the height of two quarters stacked on top of each other.
By comparison, your average consumer lawnmower has a minimum height of around two inches. To get down to an eighth of an inch, you’ll need a specialized reel mower, which can run in the thousands of dollars.
The reason for this is that a standard rotary lawn mower cuts your grass with a single rotating blade. At very low heights, this method isn’t effective. On the other hand, a reel mower works with a pair of blades, which swing together like a pair of scissors. This allows for precise, low-level cutting.
As you can imagine, this also affects how much variation your green can have. Even a slight bump or dip can cause a reel mower to “bottom out”, so constant attention with a lawn roller is needed to keep your green looking fresh and healthy. In addition, the reel mower itself will require constant maintenance. The rollers on the bottom require calibration before each mow; you’ll need dial calipers to ensure pinpoint-accurate adjustment.
You’ll also need to ensure that your blades remain sharp, and not just file sharp like a rotary mower blade. On a reel motor, you have 10 to 15 separate blades, in addition to a bed knife. And all of these need to be razor-sharp for a precision cut, which means you’ll need to invest in a set of special grinders. That’s a lot of equipment required just to cut your green.
You’ll also need to keep the fringe well-trimmed, although that can be achieved with the lowest setting on a standard push mower — provided you don’t mind the “fringe” looking like the rough on a standard golf course.
A lot of people don’t consider the other maintenance required, as well. For one thing, you’ll need to water religiously. We mean every day, preferably in the early morning before the sun is out. For another thing, weeds and crabgrass are a constant hazard. You’ll need to go over your green with a fine-tooth comb on a weekly basis, pull out any offending plants, and patch damaged areas.
Artificial Greens
Artificial greens give you an easy experience that requires virtually zero maintenance. They won’t dry out during a watering ban, and they require no weeding; just use a leaf blower to clear away any debris that happens to fall on your green.
The only actual maintenance you’ll have to do on a synthetic green is checking the edges once a year to ensure that all the ground spikes are fully anchored and haven’t rusted out.
That said, good artificial turf can be expensive. And if you decide to use a cheap indoor/outdoor carpet, you won’t be doing yourself any favors. They play horribly, and they look fake even if you’re legally blind and not wearing any glasses.
Invest in quality turf, and you’ll have a long-lasting putting green that you can practice on for many years.
Finally, artificial greens are suitable for any climate. So even if you live in a desert or a cold area, your green will stay, for lack of a better word, green.
Step 3: Grading and Landscaping
The first step to installation is ensuring that your putting green is properly graded and that there’s plenty of water drainage. You’ll also need to install a liner to keep your green free of weeds.
To achieve this, you’ll first need to remove any existing grass. You can rent a sod cutter for relatively little expense, but you can also achieve the same result with a shovel and a little elbow grease.
Don’t forget to clear out a fringe, as well. You’ll need a minimum of 12 inches, but up to 24 inches is fine if you want a wider fringe. The fringe is more than just a cosmetic feature. It also allows you to install a retaining wall, which will keep grading materials where they belong, prevent erosion, and allow for easy drainage.
The next thing you’ll need to do is dig down deep enough for a gravel base, which means digging down about 18 inches. Once again, you can use a shovel, but it’s a lot faster and easier if you rent a mini excavator for the afternoon. Ensure that the bottom of your form is flat and level. Use a tamper and a long level, preferably 4 feet or longer, to ensure that you’ve got a stable base. If necessary, you may need some fill dirt to build up one side or the other. Make sure to wet down both the new and the old dirt before tamping, in order to get a consistent base.
Now that you’ve gotten your form dug out, build your retaining wall around the edges. You can do this with any type of landscaping blocks and capstones, so shop around and find a color and shape that fits with the rest of your landscape.
Next, you’ll need to protect your green from weeds. The retaining wall goes a long way towards helping with this, but a bed liner will help even more. Use a porous landscaping cloth, not a plastic liner. This will keep out weeds and shoots, but will still allow water to drain.
Next, you’re going to need a base for drainage. For this, you’ll need to lay down a six-inch layer of ¾-inch gravel. You’re going to need a lot of this material, so don’t buy it by the bag from Home Depot; you’ll spend a small fortune. Go to a landscaping supplier and buy it in bulk. Lay down your gravel in 2-inch layers, tamping and leveling each time. A plate compactor will make short work of this job, but you can use a manual tamper if you want to save money.
Next, you’ll want to cover the gravel layer with sand. Do this the same way you laid down the gravel: 2 inches at a time, tamping as you go. If you buy dry sand, make sure to wet it down with a hose as you apply it. This ensures that you get full, even compaction.
Finally, you’ll want to put down six inches of quality topsoil on the top – 2 inches at a time, tamping as you go, just as you did with the sand and the gravel. Don’t use cheap fill dirt! Your green depends on good soil to grow thick and lush. Please note that this third step isn’t necessary if you’re using artificial turf. In that case, you can dig out a 12-inch bed instead of 18 inches, and skip the topsoil.
Step 4: Add Drainage
Before you finish off your putting green, it’s important to ensure that it has adequate drainage. After all, it doesn’t matter much if the green is smooth and clear if it’s suddenly covered by half an inch of water every time it rains.
Before you install the turf or carpeting, dig a trench under your green that runs through the middle and drains on each side. This trench should be lined with rocks and gravel and should be sloped so that it drains completely clear of the putting surface.
As we’ve mentioned, it’s also important to ensure that your whole installation is lined with gravel. If you haven’t followed our guidelines, please re-read step 3 and make sure you’re doing things right.
And as always, if there’s any significant doubt, ask for advice from a landscaper you know and trust. They can oftentimes offer specific advice for a fraction of the cost of a full install, provided you have a good relationship.
Step 5: Install Turf or Carpeting
Once you’ve got your bed landscaped, lined, and tamped down, the next step is to install the new surface. Whether you’re going with turf or carpeting, you’ll still need to ensure that it’s well installed.
We’ve already gone over the pros and cons of carpeting versus artificial turf, so we won’t recap that here. But either way, you’re going to need a reliable putting surface.
Also, as we’ve mentioned before, the fringe area around the green should measure at least 6 inches in width, if not 12 inches for maximum drainage. This area can also help to account for extra slope around the edges, which can accommodate awkwardly-sloped lawns.
If you’ve laid your pavers section by section, piece by piece, constantly re-measuring the level, you shouldn’t need to make any adjustments at this point. You’ll want to make sure that your stone caps are lower than the green.
There are two reasons for this:
- The green itself will require a rubber lip or retainer (even if the green is artificial and requires no water).
- Even without a lip, your green needs serious drainage. If the stone caps are higher than the green and the wall is well constructed, water can pool up after a storm, turning your putting green into a mud pit.
Assuming that you’ve followed this advice, as well as the advice from our previous section, you should be well set up to install the surface of the green itself. Thankfully, we’re about to give you a few pointers about how this is done.
If You’re Planting Your Own Grass
When it comes to planting, cover your grass seeds with hay before you water. These seeds are going to attract birds, and if the birds are after your seeds, you’re not going to experience much growth.
For bare grass, the requirements are simple. Aerate frequently, run a weighted lawn roller over the green, and use a quality mower – as we have already discussed.
If You’re Building an Artificial Green
Before you start, lay the entire piece of outdoor carpet or Astroturf out in front of you. Ensure that the entire profile covers your target area.
The reason for this is that it’s easy to overestimate space outside. When it comes to actual measurement, it’s a good idea to estimate up to 10 percent extra in each dimension, in order to ensure that there is more than enough material to go around.
Of course, an artificial green requires anchoring, which requires a wide range of tools. We recommend non-galvanized spikes that measure a minimum of 6 inches in length. Frankly, any shorter than this, and you can kiss your garden liner and your plants goodbye in any type of rough weather. On the upside, 6-inch spikes aren’t terribly expensive.
That said, once you’ve tucked in the Astroturf, your job is complete. No further maintenance will be required.
If You’re Installing Rolled Natural Turf
Similarly to installing carpeting, you’ll need to plan ahead when it comes to your cuts. After all, most jobs require more material than you’d plan. Just as you would with artificial turf, lay everything out first before you make any cuts.
Once you’ve got your space measured out, you’ll need to use a chalk line to measure out the dimensions. Next, cut the ground with a turf cutter. If you’re trying to save money, a long razor knife will do the trick, but be prepared to change blades frequently.
By the way, if you’re working in turf, it’s a good idea to use knee pads. This may not feel necessary on the day of the work, but believe us, if you don’t wear knee pads, you may experience significant pain the next day.
While you’re cutting the bed, move as slowly as possible to improve accuracy, and favor long lengths over short lengths. This ensures that you won’t leave your property line.
Step 6: Install the Hole and Pin
Now, at the end of it all, you’re ready to install your putting hole. There are many products, such as the Standard Golf Hole Cutter Guide, that can make this easier.
And why limit yourself to a single hole? To practice a variety of shots, it’s a good idea to create several holes.
You may or may not need a pin. For most putting greens, it’s simply unnecessary. If you have a large property and you’re chipping or using an iron before you hit your green, then a pin may be a good idea.

Last update on 2025-03-28 / Affiliate links / Images from Amazon Product Advertising API
Step 7: Decorate
Much like an actual golf course, half the attraction of a backyard putting green is the fact that you get to go outside and enjoy the outdoors. So why not spruce things up with some decoration?
The most obvious thing to do is install a garden bench or chair nearby, preferably under some shade. This way, you’ll have somewhere to sit down and rest in hot weather.
But you can also get creative. A small pond or a sand trap can simulate the type of hazards you’ll see on a real golf course. Not only can these types of features be attractive but they also help if you’re working on your short game.
Or, You Can Just Buy One…
If all this sounds like a bit much, we understand. This is an involved process that takes a few days of hard work – and some help from friends and relatives – to get the job done right.
Thankfully, there are other ways to get your own backyard putting green. For instance, you can pay a professional to do the job for you.
Many companies, such as Pro Putt Systems, offer this type of service. Simply send them a picture of your location, along with the total square footage of your proposed green, and they’ll get back to you with an estimate that includes the total cost of landscaping and installation.
As far as ease of installation goes, that’s hard to beat. On the other hand, you’ll be paying significantly more, but you also won’t have to do all the hours of work.
Conclusion
A backyard putting green has many advantages. It makes your golf practice more convenient, brings it closer to home, and it allows you to practice over the weekend.
Then again, it’s also a bit pricey. That said, if you want to know how to make a backyard putting green, we think we’ve done our job. We hope we’ve helped!