Maybe you notice it happens every spring. The rain starts, and your yard floods — again, making you wonder how to improve drainage in your backyard.
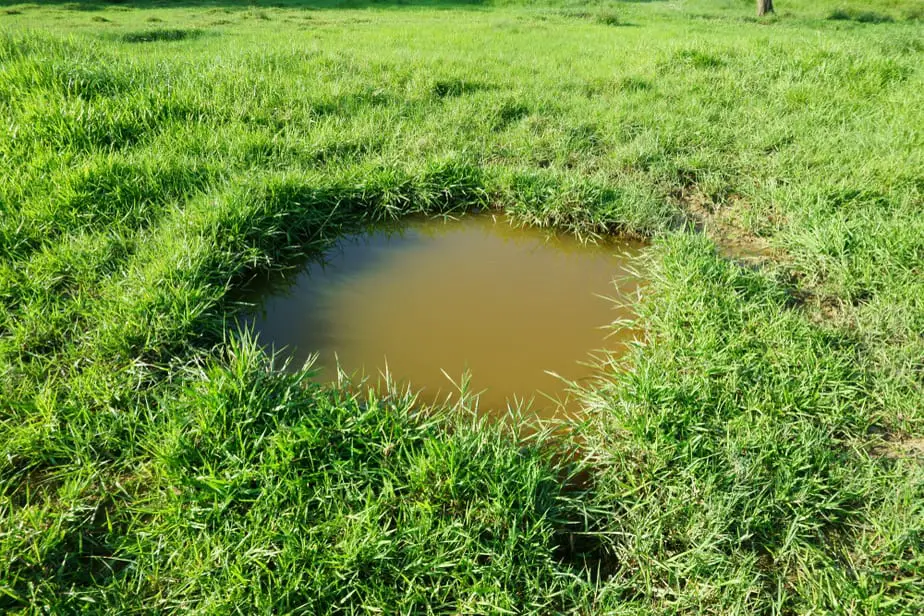
We understand how having a quagmire of mud for a yard is irksome. It’s no fun having to wipe the dog’s feet every time he comes and telling your kids they can’t play in the backyard.
We have several solutions that can help you take your yard back. It involves a few preliminary steps that will save you a lot of hassle in the long run.
Table of Contents
Your Drainage Plan
The problem may exist simply because you have a low spot in your backyard. Other times, it’s the habitat, which may be ephemeral or permanent wetlands.
Your solution, therefore, depends on the nature of the problem. Let’s talk about some ways to get the water under control.
Step 1: Find Out the Drainage Patterns
This task is vital for determining a solution and putting it into place. Does your yard flood just in the spring or after every rain year-round? Also, ask yourself where the water is pooling. Are there obvious places where the water is coming from such as a downspout or sloped driveway?
Step 2: Troubleshooting the Water Problem
Surface runoff is an easy DIY fix that isn’t expensive or hard to do. If the water is coming from the gutters, then you need to start there.
Check to make sure that they are clean of leaves and other debris that could impede the flow of runoff from your roof. Also, check the drainpipes to make sure they’re free-flowing, too.
If you’ve noticed seepage in your basement, it’s likely that you’ve found the culprit. You’ll need to extend the length of the downspouts farther away from your house with extra lengths, ensuring that the discharge is away from the building.
Collect the Water
Another solution is to install a rain barrel. The advantage of this method is that you’ll have water for your garden to save money on your utility bill.
The downside is that it’s a source of standing water that can attract mosquitoes. The fix is to add mosquito dunks to the barrel once a month to kill off the hatch without contaminating the water for people, wildlife, or plants.
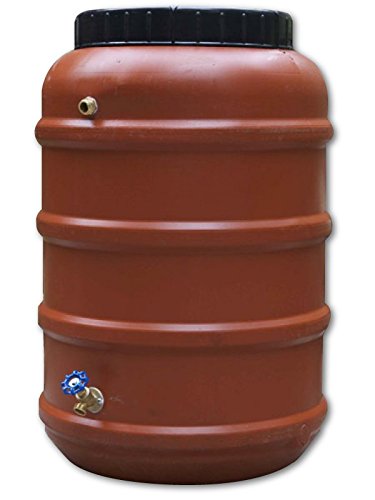
- Used Food Grade Repurposed Recycled Plastic Barrel, previously used to hold olives
- New brass spigot and new brass overflow valve
- Easy on/off twist top lid with new plastic mesh screen
- New downspout adapter included
- Sealed with waterproof 100% silicone caulk
Last update on 2025-03-28 / Affiliate links / Images from Amazon Product Advertising API
Getting Control of Runoff
If the source of the water is runoff from a driveway or other impervious surface, you can slow the flow by using porous paver stones.
Instead of flowing into your backyard, the water seeps into the ground underneath to help prevent pooling downstream. You’ll find many attractive designs at your local home improvement store or garden center.
Step 3: Work with the Problem
These solutions are more involved but provide a permanent fix. They also benefit birds and wildlife, making them eco-friendly.
If you have standing water in the same areas every year, the chances are it is wetlands. These ecosystems are some of the most endangered ones in the country, with losses of over 50 percent since the Revolution.
That means that many of these spaces are protected by local, state, or federal law, along with the plant and animal species that call them home. The chances are then that you can’t just cover them up and call it a day.
A smarter idea is to embrace it and make wetlands a part of your landscaping.
Creating a Rain Garden
A rain garden is another take on landscaping with native, water-loving plants. It offers several advantages for you as a homeowner including:
- Controls runoff
- Filters water
- Provides habitat for wildlife and birds
- Prevents soil erosion
- Offers an attractive solution to an annoying problem
The process involves planning for choosing the right plants and planning for some work to set it up with proper drainage. We strongly urge you to stick with plants from your area to provide the most benefits to local wildlife.
It also can increase your chances of success with the rain garden by starting with plants that are used to the conditions and are of the right plant hardiness zone. You’ll find a host of choices in different colors and forms to make the space aesthetically pleasing.
You might consider giving your local extension service or state DNR office a call to help you pick suitable plants for your project. You may even qualify for funding your project by restoring habitat.
Get some graph paper and draw out the plan for your garden, taking into account the space that each one needs to thrive. If you’re adding trees, make sure to place them far enough from your house since many are shallow-rooted.
Place the garden at least 10 feet from your house to prevent seepage into your basement. Once you’ve planned your layout, then it’s time to get to work.
The project consists of these steps:
- Digging the area where the water will pool
- Improving drainage with soil amendments like sand or rocks
- Building a berm to contain the water
- Adding plants
- Mulching
- Directing water to the rain garden
Make sure to call 811 before you start to avoid hitting any utility lines. You won’t need to dig far since about a foot will do.
If the soil is clay, adding sand or river rocks will improve drainage and make a healthier environment for plants that don’t like standing water. Add a berm on the low side of the garden to contain the flow in the garden. You can use decorative rocks to make it more attractive and part of your landscaping theme. Now, it’s time to plant.
Use the naturally occurring slope of your rain garden to place your wetland plants, following their degree of tolerance for standing water. Place two or three inches of mulch around them to keep them in place until they get established. The chances are if water pools to the site already, that the flow isn’t an issue. However, you can also direct your downspouts toward the rain garden to provide additional moisture.
It will take at least a year before your perennials set down roots in their new home. In the meantime, keep an eye on the rain garden, especially during dry spells and after heavy rains.
Bear in mind that you can use those same mosquito dunks for your rain barrel in your garden since they are non-toxic.

- Kills mosquitoes before they're old enough to bite
- The only product with bti, bacteria toxic only to mosquito larvae
- Lasts for 30 days and treats 100 square feet of surface water
- Non-toxic to all other wildlife , pets, fish, and humans
- Labeled for organic gardening by the usepa
Last update on 2025-03-28 / Affiliate links / Images from Amazon Product Advertising API
Add a Water Feature to Your Backyard
An alternative to a rain garden is to add a water feature to your yard such as a waterfall or a pond.
You can slow the flow and prevent soil erosion by creating a pathway for it to go using river rock. It’s an excellent solution if the water flow is starting to dig a channel.
The process is similar to creating a rain garden, only you’ll stick to the area of the current flow and get it under control. You can make the feature more interesting by placing a meander or two in its path.
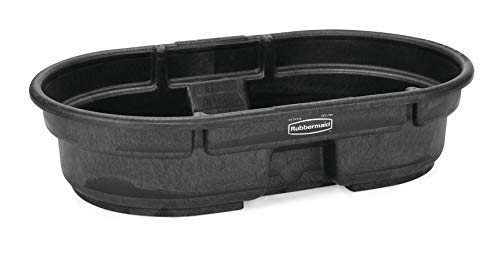
- MULTI-PURPOSE: 50-gal stock tank can withstand a variety of uses. Use cases range from farm life to a creative solution for daily life projects.
- DURABLE: Structural foam resists weathering and crackingand cleaning.
- STRONG CONSTRUCTION: Stepped sidewalls resist bowing and provide added stability.
- REINFORCED: Ribbed construction adds durability and strength.
- DIMENSIONS: 52"x31"x12"
Last update on 2025-03-28 / Affiliate links / Images from Amazon Product Advertising API
Step 4: Make Permanent Flow Changes
Depending on your situation and the lay of the land, you may need to take other measures to get the drainage under control. One hands-on solution is to dig a drainage ditch. This task is more involved and labor-intensive. You’ll need to contact your city hall before you start work since many areas regulate stormwater discharge.
Essentially, the project is laying a perforated pipe down the length of a dug-out trench to direct the water off your land, not unlike a culvert. It’s something that you can do, bearing in mind that it involves a lot of digging and hauling. You can also job it out to a landscaping company with expertise in dealing with water issues. The advantage of going this route is that they will know what you need to do as a property owner to follow any laws or regulations.
Other options include installing an underground French drain or dry well. It is similar to a trench without a directed flow off-site. Instead, the addition of gravel or a perforated pipe improves the drainage by containing it while it seeps down into the soil.
Tips for Success with Improving Drainage
As you can see, you have many options for correcting this issue. There are a couple of other things we suggest you keep in mind:
- Take care when choosing plants like cattails or willow trees for your rain garden, both of which grow quickly and can crowd out others.
- Monitor the water flow periodically and make changes or repairs as necessary.
- Fix other sources of surface runoff such as walkways by raising them or placing gravel along the path to slow the flow.
Final Thoughts
Standing water and runoff are problems that you can easily fix. Whether you choose the natural route or something artificial, you’ll increase your property value and get more use out of your yard.
Once you know how to improve drainage in your backyard, you have the know-how to make it right and use it to your advantage. All it takes is planning and understanding the patterns of water flow on your site.