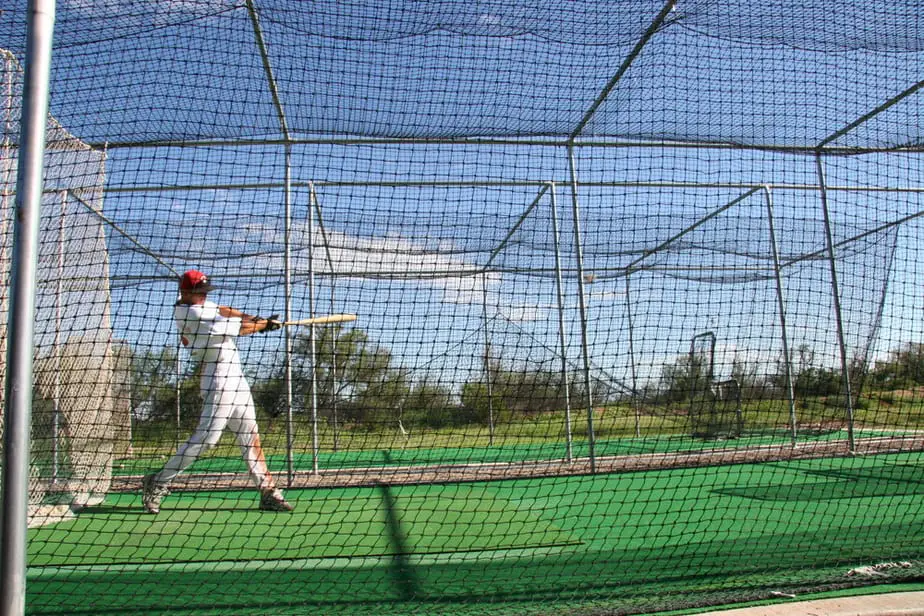
Practice makes perfect, but frequent baseball or softball batting practice can get costly. Trips to the batting cage can cost you upwards of $45 per hour or more! If you are serious about getting frequent batting practice, you may consider how to make a batting cage in your backyard.
In the long run, if you make a batting cage in your backyard, you can save money. Full kits can be purchased online; however, they come at a price tag of thousands of dollars. In this article, we will show you how you can make a batting cage in your backyard that will save you money.
Table of Contents
Materials (Suitable for 55 ft. Length):
- Batting cage purchased to your desired dimensions
- 4 Bags of cement
- Shovel or auger
- 4 Wood stakes
- 4-6 Galvanised 3”-4” steel posts extended to 13-15 feet
- 230ft / 70m Of 4mm 7×7 Galvanised Steel Wire
- 55 Galvanised Carabineer 5mm Snap Hooks
- 12 Galvanised Wire Rope Grips 5mm
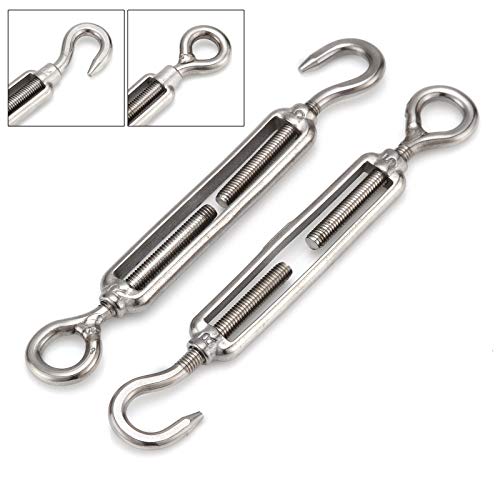
- 6 Galvanised Straining Screw Hook & Eye 5mm
- Wire Cutter
- 4-6 Heavy Duty 3/8” x 6” Eye Bolts
- 12 Tent Stakes
- Home Plate (optional)
- Pitching Machine (optional)
- Spray Paint (optional)
- Artificial Turf and Additional Cement (optional)
Last update on 2025-03-28 / Affiliate links / Images from Amazon Product Advertising API
Step 1: Location and Flooring
You probably already have a vision in mind of the perfect batting cage location. When setting a location for your batting cage, think about the space you have available. If you have a smaller yard, you will need to keep the cage on the smaller end. The typical batting cage is 10-12 feet wide, but you can go a little bit smaller on the width if you do not have the space. The length for your cage should be 20-40 feet for children and 70-80 feet for adults.
Choose a location in the yard that is relatively flat, especially if you are using a pitching machine. You may choose to level the batter’s box area and where the pitching machine will stand.
If you choose to use a grassy location, remember you will need to mow inside the cage by lifting the net. We will be using a cable suspension system that will allow you to move the net out of the way if needed.
A dirt area is also suitable. However, dirt will become unusable while it is wet and muddy. Adding turf or rubber sports court under your batting cage will add cost, but will definitely be worth it during the rainy season!
Concrete is another great option for flooring. Concrete can even be used only under the batter’s area to reduce cost and labor.
Step 2: Purchase Batting Cage Net
We recommend buying a premade batting cage net in the size that you want. There are many great options available and we think you will be happy that you purchased. Amazon has batting cage netting available in almost any size you need. However, you can also purchase loose netting and customize it to your liking through sports supply stores.
No products found.
Step 3: Mark Cage Area
Using the measurements of the batting cage you purchased, mark the four corners of the cage in the designated area. Square the corners of the rectangle and place stakes in the four corners. This will be where the main posts of the batting cage frame will sit.
Step 4: Choose Post Frame
Poles will create the mainframe of your batting cage. Choose materials that will last in the weather and for how long you wish to have a batting cage. You also need to decide if you want to be able to remove the frame during the winter or leave it up all year. The options include:
- Galvanized steel posts
- 4×4 wood posts
- PVC pipe-schedule 40
- 3″ square tubing 14 gauge
Since galvanized steel posts are both cost-effective and will last many years, we recommend this as your top choice. Your steel posts will need to be extended to about 13-15 feet for batting cages that are 10-12 feet high. Sometimes fence supply stores or Home Depot will do this for you. At a fence supply or metal store, you may also be able to find poles that are the height that you need without extending.
Sturdy heavy-duty wood posts do not require any specialized tools to cut and create a durable structure. You will need a 4×4 wood beam that is 15-16 feet tall in each of the four corners. A header board should be attached that is the width of your cage. Since wood has the tendency to bow over time, you should also add support beams. A video by Crushlife Acres shows how he made a batting cage frame using wood and steel cable.
If you decide to use PVC or square tubing, you will need to create several U-shaped frames down the length of the cage. A benefit to the PVC and square tubing is that you can easily make the entire system portable. Check out this website that has more instructions on PVC pipe frames.
Keep in mind that only wood and metal are recommended when installing a cable suspension frame. If you are using PVC or other plastic posts, you will not be able to use cable suspension and will need to add posts down the sides.
Step 5: Set Posts
Before digging holes and setting posts, double check your measurements and corners! Two posts on either end, for a total of 4 posts, should hold your net with the addition of header cables. For wide batting cages, you may also choose to add a third pole in the middle of each end for added support.
After you have cut and extended your posts to be 13-15 feet tall, attach the eye-bolts near the top of each post. One set of eye-bolts should face the length of the cage and one set faces the opposite end post. You will be using these to attach wire rope and hold up the sides of the batting cage.
Where your stakes were placed in step 2 dig four holes about 3 feet deep. If you added a third pole to each end, then dig a hole in the middle of each cage end the same depth.
Since your metal poles will have tension from cables, we suggest sinking your poles into the ground about 3 feet and securing with cement. If you would like to be able to remove your net, you can add a sleeve using a pipe slightly larger than your posts and setting it in the cement first.
Do not attempt to set the poles without help. This may be a job for a professional, but you can do it yourself as long as you enlist the help of some friends! Remember, safety first!
Take a break for a day or so and allow the cement to cure before continuing with the cable suspension process. If you try to attach the wire cables and cage before the cement has fully set, you may have to start all over!
Step 6: Attach Suspension Cables
Now that your cement has cured, you are ready to attach the steel wire cables and connect the net. Use the eye-bolts, straining to screw eye and hook, and steel grips to attach the wire rope from one post to the post at the opposite long end. If you have never installed steel grips to wire rope before, make sure to learn how to correctly attach them before beginning the process.
First, create an eye loop at one end of the wire and connect it to the eye bolt on one end post. Then, run it down the length of the cage to the opposite post where a screwing eye and hook are attached. Next, cut the wire rope at an adequate distance for adding an eye loop and steel grips to close this end of the wire rope. Finally, with the screwing eye and hook open as far as it will go, attach the wire rope and tighten.
Repeat until all posts are connected with wire rope to the posts across from it.
At both ends, create a header cable by connecting a wire rope from one end post to the other using the eye hooks that were attached in step 4. Make sure to tighten the header cable before adding a support cable down the middle of the batting cage.
Run the steel wire rope down the middle length of the batting cage to the header cable on either end. Secure the cable with wire grips and carabineers.
Step 7: Connect the Net
Your batting cage is almost complete! Connect the batting cage net to each post end using the ropes on the net. Use additional carabiners to attach the top sides of the net along with the cables every 3-5 feet of the net or as needed. Repeat this down the length of each cable.
The net should not be stretched tight. It is ideal to leave the net slightly loose so balls do not rebound off the net.
Use tent stakes to stake the net to the ground along the base. This will prevent balls from escaping the net and rolling away.
To remove the net for ground maintenance, untie the ropes and remove the tent stakes. Then, slide the net attached to the carabiners to one side of the frame. Mow, then replace the net and tent stakes!
Step 8: Add Accessories
There are a few items you should consider adding to your now complete batting cage. The first is a rubber backstop. A rubber backstop can be purchased online. It will improve the longevity of the net behind the batter and protect anything behind the batting cage that may get repeatedly hit by balls.
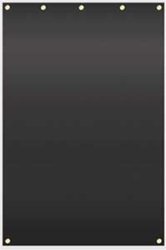
- Heavy Rubber Absorbs Ball Impact
- Increase the life of you batting cage
- Use as a backdrop in backyard
- Grommets allow for easy hanging
Last update on 2025-03-28 / Affiliate links / Images from Amazon Product Advertising API
A pitching machine is a must to make the most out of your batting cage. If you have a pitcher and a pitching mound to practice, then this can make for a great practice. However, people tire out faster than a pitching machine! Get hours of batting practice by adding a pitching machine to your batting cage.

- Versatile Training Tool: Elevate your baseball skills with the PowerAlley Lite 360 Baseball Pitching Machine, designed to enhance hitting, pitching, and fielding abilities for comprehensive player development.
- Dynamic Pitch Selection: Rotate the swivel head to deliver a variety of pitches including fastballs, sliders, and curves, ideal for players of all ages and skill levels aiming to refine their game.
- Adjustable Speeds: Tailor your practice sessions with adjustable speeds ranging from 40 MPH to 80 MPH (with Heater Sports Lite Balls), accommodating different player preferences and optimizing training efficiency.
- Comprehensive Fielding Practice: Perfect your fielding techniques with drills covering pitching, grounders, line-drives, and pop flies up to 200 feet, enhancing hand-eye coordination and defensive skills.
- Safe and Efficient Design: Ensures safety during use with a fully enclosed solid wheel, providing a secure environment for training sessions. Note: Designed for use with Lite balls; real baseballs not recommended.
Last update on 2025-03-28 / Affiliate links / Images from Amazon Product Advertising API
When you have purchased a pitching machine, use, and i-screen to protect it from hit balls! These can be purchased online or in sports specialty stores. If you prefer, you can even build your own.
Home plate and a batter’s box are cheap and easy accessories to add to your batting cage. This will help you to practice looking for strikes and bat with better form. Use spray paint to draw a box and purchase a home base before completing your batting cage.

- Official size with suction grip underside for use indoor and out
- Heavy duty white molded rubber
- No spikes
- Ideal for setting up a baseball, softball or kickball field
Last update on 2025-03-28 / Affiliate links / Images from Amazon Product Advertising API
Conclusion
Now you have learned how to make a batting cage in your backyard! You can afford to practice your batting technique as often as you wish. In fact, you can invite the entire team over for cheaper than a day at the batting cages!
Step up and swing batter! This batting cage with steel posts and cable suspension will last years of play. You may have even built it to be removable during winter or off-season months.
With a little bit of footwork and labor, you saved yourself thousands of dollars by learning how to make a batting cage in your backyard without purchasing a full kit. Your family is sure to spend their days out in the batting cage having fun while improving their batting technique!