A whole lot of people have put a whole lot of time into determining what the best way to throw a horseshoe is. It’s a tricky skill to master, and there are lots of different elements to take into account when learning how to play, but don’t worry! We’ve compiled all the information you need to learn how to throw a horseshoe here.
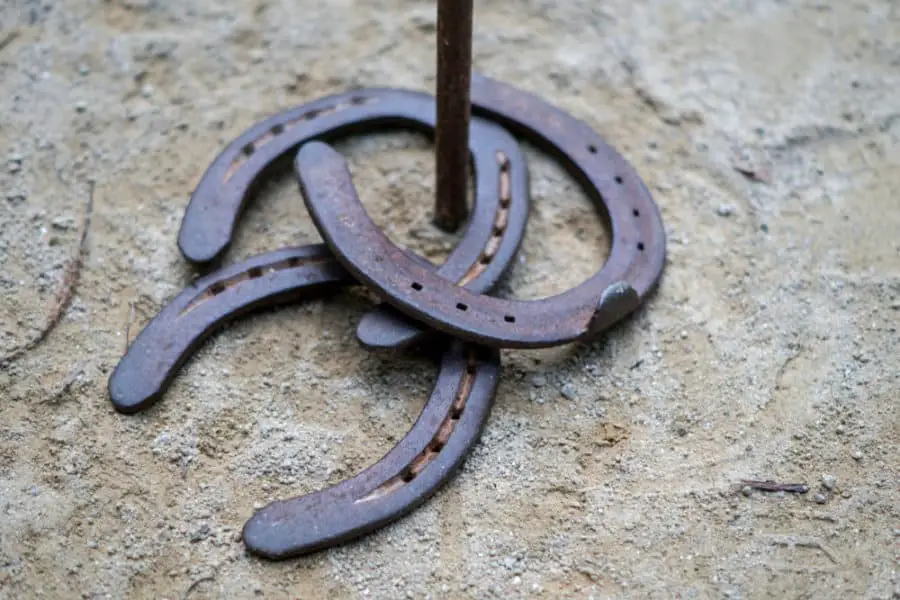
Table of Contents
The goal of the game
The goal of horseshoes is simple; its execution, less so. If you’re playing on a proper regulation size court, a stake sticks out of the ground 37’ away from you and your goal is to throw, or “pitch,” your horseshoe so that it lands in such a way that the iron encircles the stake. That’s called a “ringer.” At the very least, you want yours to land closer to the stake than anyone else’s. It sounds easy enough, but there are many different strategies for pitching the old horseshoe and there is an incredibly passionate community of players who will tell you different things about which pitch is the best.
Setting up the court
First thing’s first, you’ll need a court to play on. The cool thing about horseshoe is that you can set up a court in your backyard right away and make it whatever length works best for you and the people you want to play with. A regulation court begins 37 feet away from the stake, with a marker at 27 feet for women, players under 18, and the elderly. If your backyard doesn’t have that much space, it’s okay!
If you’re reading this, you’re probably not a professional and you just want a fun backyard activity, which means you can make your court the way you want it and adjust it to the space you have to play in. If you’re playing with children or elderly folks, you might want to shorten the court a bit more – those horseshoes are heavy and can be tough to throw.
Once you’ve settled on your length, it’s time to plant the stakes. First you’ll need to loosen the soil up around the area you’ll be planting your stake, but just the top two to four inches so you don’t disrupt the deeper soil you’ll be driving your stake into. You want to place one stake at either end of the court and drive them into the ground at a slight angle, tilted approximately 12 degrees towards each other, rather than directly vertical.
You’ll need to use long rods, as they should have about 15 inches remaining above ground after they’ve been planted. Your best bet is to use an iron rod that’s about 36 inches long and an inch in diameter. That’s all you need to play! If you want to improve your court for easier play, and make it a more permanent fixture, we have some tips for that too!
Improving your court
If you’re finding that your stake keeps coming loose after people pitch ringers (and good for you because that means your aim is on point!) then you can do some slightly heavier modifications to your court. One of the best, and cheapest, ways to secure your stake is to bury a log somewhere between six or eight inches below the ground and drill a hole in it to keep your stakes in place and secure.
Once you’ve made the jump to a permanent horseshoe set up, you can build a backboard for your stake. This will keep the loosened soil from being knocked away by flying horseshoes. For best results, keep this pit filled with a layer of moist sand or moist blue clay, which will help keep your shoes where they land, rather than letting them bounce away.
Playing the game
Horseshoe can be played with two people competing against each other, or in teams with two people on either team. Each team gets two horseshoes and throws both of them on their turn. Typically you’ll play to a certain point threshhold, which you decide before the game begins, depending on how much time you have and how competitive your players are.
Scoring
There are several different variations of a scoring system you can use. The simplest system states that any time the horseshoe is within six inches of the stake, one point is awarded. If a player scores a ringer, which means that the horseshoe lands around the stake, they are awarded three points. You have the option of giving two points, instead of one, for “leaners” which lean against the stake but don’t circle it. Once you decide how many points you want to play to, it’s game on!
If you’re playing with a more competitive group of friends, you can use the competitive rule set, which means that of the four horseshoes thrown in a round, only the person whose horseshoe lands closest to the stake gets a point. If they’ve thrown both of their horseshoes closer than either of their opponents, they get two points. You still get three points for ringers, but if both teams have scored a ringer, no one gets the points for it.
Pitching those shoes
Your court is ready, your teams are chosen, and you’ve agreed on a scoring system. It sounds like you’re ready to start throwing some pitches! Make sure that the other team or player is standing well clear of the stake before you throw. Horseshoes is a fun game, but a stray horseshoe can cause serious injuries.
There’s a ton of discourse among horseshoe professionals and enthusiasts about what the best way to actually throw a horseshoe is, but they all agree that there are three main ways to pitch a horseshoe, which are determined by the grip you use to throw with.
Different types of grips
1¼ turn grip
Most men who play professional horseshoe will use this grip. It involves holding the horseshoe by the “shank,” which is the fancy horseshoe word for one of the sides of the shoe.
The idea is that the horseshoe will rotate 1 ¼ times in the air before landing delicately (or not so delicately) around the stake in a ringer! To pitch a horseshoe using the 1¼ grip, keep the horseshoe flat in front of you with the shanks pointing to the left. You’ll want to hold the center of the shank for your first go around, but with practice you can find where the most comfortable and effective gripping spot is for you.
Your thumb should be on top of the horseshoe and your index, middle, and ring fingers go underneath, curling around just to the inner edge. You use your pinky to stabilize your grip, so it should extend underneath the horseshoe, pressing upwards to keep everything level. If it’s more comfortable for you, you can put your ring finger along with your pinky for added stabilization. If you’re left handed, the grip is the same but your horseshoe should be pointed to the right instead.
¾ or 1¾ turn grip
While this grip and throwing style is similar to the one above, when gripping for these turns, you want to start with the horseshoe’s shanks pointing to the right, which means you’ll be throwing counterclockwise this way. The hand positioning is basically the same as above, keeping your thumb on top with your pinky finger acting as a stabilizer on the bottom of the horseshoe and your three middle fingers gently curling around the inner edge. With this grip style you’re more likely to get a little bit of wobbling as your horseshoe flies, which isn’t necessarily a bad thing. This can be reduced by shifting your grip down towards the open end of the horse shoe, which gives you a flatter and speedier rotation.
Flip grip
This grip is used most commonly by women who play professional horseshoe because they play on a slightly shorter field and this grip allows for the most consistent results from an experienced player. It’s also the most common grip for backyard players, who also are often playing on shorter courts.
To use the flip grip, all you have to do is hold the horseshoe in the center of the arch, instead of on one of the sides like with the other two grips, but you’ll hold it pretty much the same otherwise, thumb on top, three fingers around the inner edge, pinky for support. Instead of throwing it through the air flat, so it’s rotating on a horizontal plane, the flip grip lets your horseshoe, well, flip. It goes top over bottom through the air.
If you’re a complete beginner, test out these grips to see which is the most comfortable for you. It varies from person to person depending on your style of play.
The stance
Once you’ve got your grip figured out, you’ll need to figure out your stance. If you’re right-handed, you’ll want to stand on the left side of the stake you’re throwing from. Lefties will want to be on the right side. You want to stand up straight but relaxed, with your shoulders squared towards the stake. Some players like to start back a couple of steps from the line and move forward as they prepare to throw. You’ll have to experiment to see what feels best for you.
The swing
If you’ve ever gone bowling, the swing in horseshoes is similar. With the horseshoe gripped in your hand, you’ll bring your arm backwards behind you, moving from your shoulder. You want to try and keep your shoulders squared up to the front, like they were when you started. As you swing it forward to throw you want to step forwards into the movement, keeping your arm straight and limiting the amount of wrist movement you use. Too much wrist and change the direction of your throw and cause you to miss, and a horseshoe on the loose can be really dangerous.
In order to get the right angle on your throw, and you’re looking to have it arch gracefully up into the air and land at a 30-45 degree angle around the stake, you have to know when to let go. The ideal spot in your swing to release the horseshoe is when it’s reached about your eye level. This should send it to wrap smoothly around the stake and score you a ringer!
Practice
Of course, the best way to improve your pitching is to practice! Even if you haven’t built your own horseshoe court, you can often find one you can play in at local parks, not to mention the many leagues there are around the country where you can go to practice, play, and pick up some tips and tricks from other players! It’s a great way to make friends and get better at playing at the same time!
If you’re curious what options there are around you, check out the National Horseshoe Pitchers Association website here. They have a handy interactive map you can use to locate clubs and leagues near you!
Conclusion
It may sound like a lot to take in, but a lot of the skill required for playing horseshoes comes intuitively and can be easily developed with practice. It’s a fun and social game, whether you’re playing it with friends in your backyard or looking to go pro in a league. Now that you’ve got the basics, it’s time to get your court set up and go play!